When the check engine light illuminates on your dashboard, it can evoke a mix of anxiety and confusion for drivers. This little light can signal a wide array of issues. Understanding how to get the check engine light off starts with recognizing that it serves as a vital communication tool from your vehicle. Whether it’s a minor issue like a loose gas cap or something more serious under the hood, addressing the underlying cause is essential for both safety and vehicle performance. Ignoring this warning could lead to more significant problems down the line, including reduced fuel efficiency and expensive repairs. This detailed exploration covers potential causes behind the check engine light, effective troubleshooting methods, DIY fixes, when to seek professional help, and preventative measures to avoid future occurrences.

Understanding the Check Engine Light
To tackle the problem of a lit check engine light, it’s important first to understand what it signifies.
What Does the Check Engine Light Indicate?
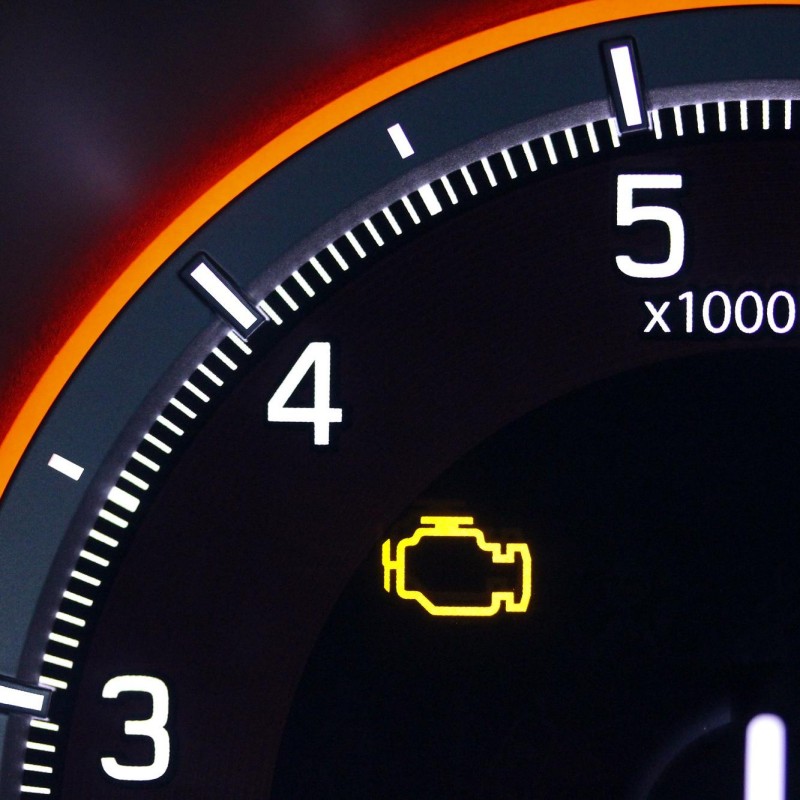
The check engine light is part of your vehicle’s onboard diagnostics (OBD-II) system. When this light turns on, it indicates that there is a malfunction in one of the various systems monitored by the car’s computer.
- Diagnostic Trouble Codes (DTCs): The check engine light triggers specific error codes corresponding to the issue detected in the engine or other systems. These error codes can be retrieved using an OBD-II scanner.
- Light Colors and Patterns: The light may be yellow or red, and some vehicles have different meanings associated with the light’s color. A flashing light generally indicates a more immediate problem that requires urgent attention, while a steady light suggests a less critical issue, albeit still needing resolution.
Common Reasons for the Check Engine Light Activation
- Loose or Damaged Gas Cap: One of the simplest causes for a check engine light to illuminate. A loose or broken gas cap can disrupt the fuel system’s pressure.
- Faulty Oxygen Sensor: The oxygen sensor monitors exhaust gases and relays data to the vehicle’s computer. A malfunctioning sensor can affect fuel efficiency.
- Catalytic Converter Issues: The catalytic converter is essential for reducing emissions. Problems with this component can trigger the check engine light and can be costly to repair.
- Mass Airflow Sensor Problems: The mass airflow sensor measures the amount of air entering the engine. An issue can lead to poor engine performance and trigger the light.
- Faulty Spark Plugs or Ignition Coils: Spark plugs ignite the fuel-air mixture in the engine. Worn plugs or faulty ignition coils can lead to misfires and activate the check engine.
Understanding these common triggers is crucial for effectively diagnosing and addressing the underlying cause of the illuminated check engine light.
Diagnosing the Root Cause
Once the check engine light illuminates, the next step is diagnosing the root cause. Here’s how to approach this task systematically.
Using an OBD-II Scanner
- Purchasing or Borrowing a Scanner: An OBD-II scanner is an essential tool for accessing the diagnostic trouble codes stored in the vehicle’s computer system. These scanners can be purchased online or borrowed from an auto parts store.
- Connecting the Scanner: Locate the OBD-II port, usually found underneath the dashboard near the driver’s seat. Plug in the scanner and turn on the ignition without starting the engine.
- Reading Codes: Follow the scanner’s instructions to retrieve DTCs. These codes provide vital clues regarding the specific issues causing the check engine to activate.
- Interpreting the Codes: Research the meaning of the codes obtained. Many auto parts stores or online resources can assist in translating codes into understandable issues.
Visual Inspection of Components
- Check Gas Cap: Inspect the gas cap to ensure it is tightly secured and not damaged. A quick fix could be as simple as replacing it.
- Inspect Wiring and Connectors: Look for any visible signs of wear, fraying, or corrosion in electrical connectors. Poor connections can lead to faults that trigger the check engine.
- Examine Hoses: Check for any cracked or damaged hoses in the vacuum system or intake manifold. These can lead to leaks affecting engine performance.
Evaluating Performance Symptoms
- Listen for Unusual Noises: Pay attention to any irregular sounds from the engine, such as knocking or hissing, which may indicate problems.
- Monitor Driving Conditions: Note any changes in engine performance, such as difficulty accelerating, stalling, or misfires, and correlate these with the check engine activation.
- Observe Fuel Efficiency: Decreased fuel efficiency can often be linked to the issues indicated by the check engine. Track changes in mileage for clues.
Following these diagnosis steps assists in pinpointing the root cause of the check engine light, paving the way for an effective resolution.
Common DIY Fixes
Once the root cause is identified, there are several DIY fixes you can implement to potentially get the check engine light off.
Replacing the Gas Cap
- Purchase New Gas Cap: If the gas cap is found to be the issue, replacing it with a proper, new cap compatible with your vehicle typically resolves the problem.
- Observe for Code Reset: After replacing the gas cap, reset the check engine light using your OBD-II scanner and monitor to see if the light stays off.

Changing the Oxygen Sensor
- Locate the Sensor: The oxygen sensor is often found near the exhaust manifold. Consult your vehicle’s manual for specific locations.
- Remove and Replace: Using a wrench, carefully remove the old sensor. Replace it with a new one, ensuring that the connections are secure.
- Check the Engine Light: After installation, reset the codes using the OBD-II scanner and monitor for any recurrence of the light.
Spark Plug and Ignition Coil Replacement
- Inspect Spark Plugs: Remove the spark plug and check for signs of wear or fouling. If they appear damaged, replace them.
- Replace Ignition Coils: If issues persist, consider replacing the ignition coils, particularly if they are corroded or discolored.
- Reset and Test: After these replacements, reset the check engine light and take your vehicle for a test drive to see if the issue persists.
Fixing Loose or Cracked Hoses
- Close Inspection: If any hoses appear cracked or loose, replace them with new hoses suitable for your vehicle.
- Secure Connections: Ensure all connections are tight, preventing any vacuum leaks that may trigger the check engine.
- After Fixes: Reset the light and monitor vehicle performance for any changes.
Performing these DIY fixes can save time and money, enabling you to handle minor issues without needing a mechanic’s help.
When to Seek Professional Assistance
While many check engine light issues can be resolved at home, there are instances where professional help is essential.
Persistent Problems
- Recurring Light: If the check engine returns shortly after you’ve implemented fixes, this suggests a deeper issue requiring advanced diagnostics.
- Multiple Codes: Receiving multiple trouble codes may indicate significant underlying problems that need expert evaluation.
Technical Complexity
- Understanding Advanced Systems: If the diagnostics involve complex systems like the car’s transmission electronics or engine management systems, professional expertise may be required.
- Tools and Equipment: Specialized equipment and knowledge are necessary for proper assessment and repair in many cases.
Safety Concerns
- Potential Hazards: If any symptoms suggest significant engine trouble, such as overheating, loss of power, or smoke, it’s best to seek help immediately.
- Avoiding Further Damage: Attempting to fix significant engine problems without the proper skills can lead to more costly repairs down the line.
Assessing situations and deciding to seek professional assistance can ensure that your vehicle remains safe and operational.
Preventative Measures for Future Issues
Taking steps to prevent the check engine from activating in the future can save you time and frustration.
Regular Maintenance
- Scheduled Inspections: Working with a trusted mechanic for regular check-ups of your vehicle can help catch issues early.
- Fluid Checks: Regularly inspect and replace fluids, including oil, coolant, and transmission fluid, as needed to maintain engine health.
Staying Informed
- Understanding Your Vehicle: Get to know your specific vehicle model and common issues associated with it. This knowledge can empower you to catch problems before they escalate.
- Check Engine Light Education: Familiarizing yourself with the meanings behind the check engine light and codes can prepare you for timely responses.
Avoiding Neglect
- Listening to Your Vehicle: Pay attention to any unusual noises, smells, or performance changes. Ignoring these signs could worsen issues.
- Timely Repairs: If you notice a minor issue, take action promptly rather than delaying repairs, which could lead to larger expenses down the road.
By adopting these preventative measures, you can minimize unexpected triggers for the check engine light and enhance the longevity of your vehicle.

In conclusion, learning how to get the check engine light off is essential for every vehicle owner. This guide has provided insights into understanding the significance of the check engine light. Diagnosing potential causes, and implementing effective solutions. Whether through DIY fixes or professional assistance. Being proactive in addressing this light can save you time, money, and the stress associated with ignored vehicle issues.
Through regular maintenance and familiarization with your vehicle’s needs, you can minimize the likelihood of encountering this problem in the future. By taking swift action upon noticing the light, coupled with an understanding of its potential impacts, you can ensure a smoother, safer driving experience. Ultimately, the check engine light serves as an essential signal, one that can lead to better vehicle health and performance when addressed promptly.


