Pocket bikes, also known as mini motorcycles, have captured the fascination of motorsport enthusiasts for years. These scaled-down versions of full-sized motorcycles offer the thrill of riding at a fraction of the cost. But what if you could take that excitement a step further by building your own? Creating a pocket bike from scratch is a rewarding project that not only saves money but also allows for customization according to your preferences. This guide will walk you through the step-by-step process of how to make a pocket bike, from gathering materials to the final assembly. Whether you’re a seasoned DIYer or a beginner, this comprehensive guide is designed to help you build your pocket bike with ease.
Understanding Pocket Bikes: What Are They?
What is a Pocket Bike?
Before diving into the construction process, it’s essential to understand what a pocket bike is. A pocket bike is a miniature version of a motorcycle, typically powered by a small gas or electric engine. These bikes are designed for recreational use and are often used on private tracks or in controlled environments. Despite their small size, pocket bikes can reach impressive speeds, making them a favorite among adrenaline seekers.
Why Build a Pocket Bike?
Building your pocket bike offers several advantages. Firstly, it provides a sense of accomplishment and pride in creating something with your hands. Secondly, it allows you to customize your bike to your liking, from the engine type to the color scheme. Additionally, constructing a pocket bike can be a cost-effective alternative to purchasing a pre-made model, as you can source materials at a lower price.
Materials and Tools You Will Need
Materials
To build a pocket bike, you’ll need the following materials:
-
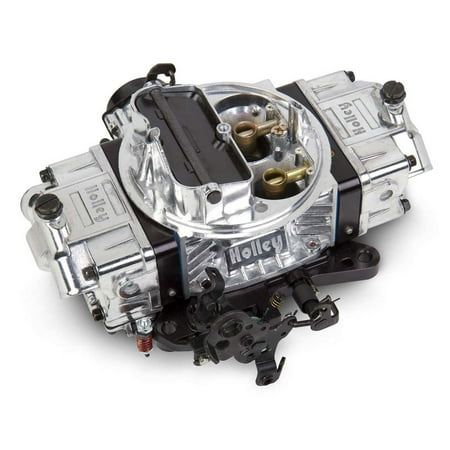
Engine: A 49cc two-stroke engine is commonly used for pocket bikes due to its compact size and power output.
-
Frame: You can purchase a pre-made frame or build one from scratch using steel tubing.
-
Wheels: Small, durable wheels designed for pocket bikes.
-
Chain and Sprocket: Essential for transferring power from the engine to the wheels.
-
Brakes: Mechanical or hydraulic disc brakes for safety.
-
Throttle and Cables: Controls for the engine’s power output.
-
Fuel Tank: A small, secure tank designed for a 49cc engine.
-
Seat: A comfortable, compact seat suitable for the bike’s size.
-
Exhaust System: A basic exhaust pipe that fits the engine.
-
Handlebars: Adjustable handlebars for steering control.
-
Body Panels: Lightweight materials like fiberglass or plastic to create the bike’s exterior.
Tools
You’ll also need the following tools:
-
Wrench Set: For tightening bolts and nuts.
-
Screwdriver Set: Both flathead and Phillips for various screws.
-
Angle Grinder: For cutting metal tubing if you’re building the frame from scratch.
-
Welder: To join metal components together.
-
Drill: For creating holes in the frame and other parts.
-
Measuring Tape: To ensure accurate measurements.
-
Safety Gear: Gloves, goggles, and a welding helmet for protection.
Step-by-Step Guide to Building Your Pocket Bike
Step 1: Design and Plan
Before you begin assembling your pocket bike, it’s crucial to have a detailed plan. Sketch out your design, including the bike’s dimensions, the placement of the engine, and other components. Determine the size of the frame, the wheelbase, and the height of the seat. This plan will serve as your blueprint throughout the construction process.
Step 2: Build or Purchase the Frame
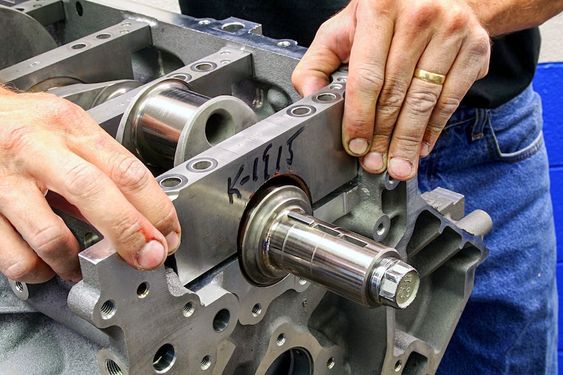
The frame is the backbone of your pocket bike, providing structure and support for all other components. If you’re building the frame from scratch, use steel tubing to create a sturdy and lightweight frame. Cut the tubing to size using an angle grinder, and weld the pieces together according to your design. Ensure that the frame is symmetrical and that all joints are secure.
If you prefer a faster route, you can purchase a pre-made frame designed for pocket bikes. These frames are typically made from durable materials and come with mounting points for the engine, wheels, and other components.
Step 3: Install the Engine
With the frame ready, the next step is to install the engine. A 49cc two-stroke engine is an ideal choice due to its power and compact size. Position the engine in the frame, ensuring that it is securely mounted and aligned with the sprocket. Use bolts and brackets to attach the engine to the frame, and check that all connections are tight.
Step 4: Attach the Wheels and Chain
Next, it’s time to install the wheels and chain. Begin by attaching the rear wheel to the frame, ensuring that it is aligned with the engine’s sprocket. The chain connects the engine’s drive shaft to the rear wheel, allowing power to be transferred. Adjust the chain tension to prevent slipping or excessive wear. Once the rear wheel is secure, attach the front wheel, making sure it is centered and aligned with the rear wheel.
Step 5: Install the Brakes
Safety is paramount when building a pocket bike, and installing reliable brakes is essential. Disc brakes are commonly used for pocket bikes due to their efficiency and stopping power. Attach the brake calipers to the wheels and connect the brake cables to the handlebars. Test the brakes to ensure they engage smoothly and provide adequate stopping power.
Step 6: Add the Throttle and Cables
The throttle controls the engine’s power output, allowing you to accelerate or decelerate. Install the throttle on the handlebars and connect it to the engine using the appropriate cables. Ensure that the throttle operates smoothly and that there is no slack in the cables.
Step 7: Install the Fuel Tank and Exhaust System
Mount the fuel tank securely to the frame, ensuring that it is positioned away from the engine’s heat. Connect the fuel line to the engine’s carburetor, and check for leaks. Next, install the exhaust system, which should be compatible with the engine’s specifications. A simple exhaust pipe will suffice, but you can opt for a performance exhaust for improved power output.
Step 8: Attach the Seat and Handlebars
With the core components in place, it’s time to add the seat and handlebars. The seat should be comfortable and positioned at the correct height for the rider. Attach the handlebars securely to the frame, ensuring that they are aligned with the front wheel. Adjust the handlebars to your preferred height and angle for optimal control.
Step 9: Install the Body Panels
The final step in building your pocket bike is to install the body panels. These panels protect the bike’s internal components and give it a finished appearance. You can use fiberglass or plastic panels, which are lightweight and easy to work with. Attach the panels to the frame using screws or clips, and ensure that they are secure.
Testing and Tuning Your Pocket Bike
Initial Test Run
With your pocket bike fully assembled, it’s time to take it for an initial test run. Start the engine and allow it to idle for a few minutes to ensure everything is functioning correctly. Slowly accelerate and test the brakes to make sure they respond promptly. Pay attention to any unusual noises or vibrations, as these may indicate issues that need addressing.
Fine-Tuning
After the initial test run, you may need to make adjustments to improve performance. Check the chain tension, brake responsiveness, and throttle control. If the bike doesn’t run smoothly, consider tuning the carburetor or adjusting the exhaust system. These fine-tuning steps will ensure that your pocket bike operates at its best.
Customizing Your Pocket Bike
Paint and Graphics
One of the most exciting aspects of building your pocket bike is customizing its appearance. Choose a color scheme that reflects your style and apply a coat of paint to the frame and body panels. You can also add graphics or decals to give your bike a unique look.
Performance Upgrades
If you’re looking to enhance your pocket bike’s performance, several upgrades are available. Consider installing a high-performance exhaust, a larger carburetor, or upgraded brakes. These modifications can increase your bike’s speed, power, and handling.
Comfort Modifications
Comfort is key when riding a pocket bike, especially for extended periods. Consider upgrading the seat to a more cushioned option or adding padded grips to the handlebars. These small changes can make a big difference in your riding experience.
Maintenance Tips for Your Pocket Bike
Regular Inspections
To keep your pocket bike in top condition, perform regular inspections of all components. Check the chain tension, brake pads, and tire pressure before each ride. Regular maintenance will extend the life of your bike and ensure safe operation.
Engine Maintenance
The engine is the heart of your pocket bike, so it’s essential to keep it in good working order. Regularly check the oil level and replace it as needed. Clean the air filter to prevent debris from entering the engine, and inspect the spark plug for signs of wear.
Storage
When not in use, store your pocket bike in a dry, secure location. This will protect it from the elements and reduce the risk of rust or corrosion. Consider using a cover to keep dust and dirt off the bike.
Safety Considerations
Wear Protective Gear
Safety should always be a priority when riding a pocket bike. Always wear a helmet, gloves, and protective clothing to minimize the risk of injury in case of an accident. Consider additional gear like knee and elbow pads for added protection.
Ride Responsibly
Pocket bikes are powerful machines despite their size. Always ride in a controlled environment, such as a private track or designated area, and avoid busy streets or pedestrian areas. Follow all safety guidelines and respect the rules of the road.
Regular Maintenance
As mentioned earlier, regular maintenance is crucial for the safe operation of your pocket bike. Don’t neglect this aspect, as it ensures that your bike remains in good working condition and reduces the risk of accidents.
Get Ready to Ride Your Custom Pocket Bike
Building a pocket bike from scratch is an exciting and rewarding project that allows you to create a machine tailored to your preferences. From designing the frame to fine-tuning the engine, every step in the process offers an opportunity to learn and grow as a DIY enthusiast. By following this guide, you can build a pocket bike that not only looks great but performs exceptionally well. Once your bike is complete, all that’s left to do is hit the track and enjoy the ride!